
Push Tier 144 with Diablo 4 Season 14 and U4GM
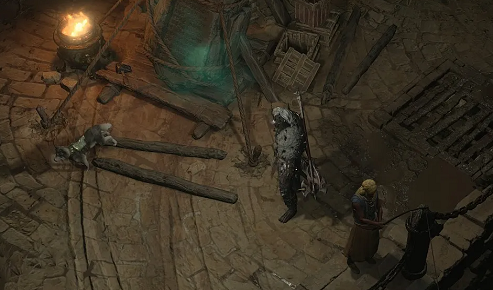
At first, the Freeze Whirlwind Barbarian can feel a little odd. You're spinning as usual, but the build isn't relying on physical damage alone. Its real strength comes from locking down packs, keeping Berserk active, and stacking bonuses against enemies that can't fight back. Once the pieces click, though, the pace changes fast. Dense rooms become fuel for Whirlwind, elites spend much of the fight frozen, and incoming pressure drops because fewer monsters are able to attack. Reaching Pit Tier 144 still demands excellent gear and clean play, so don't expect a fresh level-cap character to walk straight in. Careful upgrades matter, particularly when sorting through Diablo 4 Items for the affixes that support resource control, crowd control, and damage scaling rather than chasing item power by itself.
How the Build Creates Its Damage
Whirlwind supplies steady hits while you move through enemies, but Freeze is what opens the door to the larger multipliers. Frozen targets count as crowd controlled, which lets several offensive bonuses overlap during the same damage window. That's why the build often feels much stronger in a packed room than it does against one stray monster. You'll quickly notice that positioning matters. Instead of spinning from one side of the screen to the other, pull enemies into a tighter group and keep your path compact. More hits land, Freeze builds more reliably, and area damage isn't wasted. Bosses need a different rhythm because they can't be held in place like ordinary mobs. Build stagger, preserve your major cooldowns, then unload when the boss becomes vulnerable. Don't burn everything the second the encounter starts. It looks busy, but it usually costs damage later.
Skills, Fury, and Combat Rhythm
Whirlwind is the centre of the setup, yet the supporting skills are doing a lot of the heavy lifting. Rallying Cry helps with Fury and movement, War Cry provides an offensive boost, and Challenging Shout gives you breathing room when the screen gets crowded. Wrath of the Berserker is best saved for a meaningful damage window rather than used whenever its icon lights up. The common mistake is treating Fury as something that'll simply take care of itself. It won't, especially before the gear is finished. If Whirlwind keeps dropping, review resource generation, Fury cost reduction, and shout uptime before adding another damage roll. A smooth spin is worth more than a flashy stat that only works for a few seconds. Keep moving, but don't wander. Short circles around grouped targets maintain pressure and make dangerous ground effects easier to read.
Gear Choices That Actually Matter
Weapons should combine strong base damage with affixes that support the build's active multipliers. Critical Strike Chance is usually valuable, while Critical Strike Damage and bonuses against frozen or crowd-controlled enemies can become major gains once the rest of the setup is stable. Cooldown Reduction helps keep shouts available, and resource-focused rolls prevent awkward pauses in Whirlwind. Defence can't be treated as an afterthought at high Pit tiers. Armour, resistances, maximum life, damage reduction, and reliable healing all help you stay in contact with targets. That contact time is damage. A so-called upgrade that forces you to retreat every few seconds may be worse in practice. Masterworking should go into pieces with several useful affixes, not merely the highest item-power number. If a roll misses repeatedly, stop and assess the cost. Burning every material on a mediocre item is a painful habit, and most players have done it at least once.
Preparing for a Pit 144 Attempt
Progress comes faster when farming has a purpose. Nightmare Dungeons can cover upgrade materials, Helltides offer a steady flow of gear, and endgame bosses are the better choice when you're hunting a specific Unique. Salvage weak drops instead of hoarding them, but keep promising items that could become useful after enchanting. Gold disappears quickly when rerolls and Masterworking begin, so set a limit before chasing one stubborn affix. Inside the Pit, gather manageable packs and focus elites before they fill the arena with overlapping effects. Keep Berserk running where possible, refresh shouts with intent, and avoid stopping Whirlwind for unnecessary movement. If a run fails, check what caused it. Dying instantly points to defence. Running out of time may signal poor grouping, weak boss execution, or too much downtime. Those problems need different fixes, and buying more raw damage won't solve all of them.
Final Thoughts
Freeze Whirlwind rewards players who enjoy an aggressive build without wanting to stand still and trade hits. It clears dense content quickly, controls dangerous packs, and has enough scaling to challenge Pit Tier 144 when every part of the character is working together. The expensive part isn't just finding rare gear. It's refining affixes, landing useful Masterworking upgrades, and keeping enough currency in reserve to correct weak slots. Players considering cheap Diablo IV Items should still judge each piece by how well it supports Fury uptime, Freeze application, cooldowns, and survival. Get those basics right first. The huge damage numbers tend to follow once the build can spin without interruption and stay close to the target through the hardest phases.

 Arabic
 French
 Spanish
 Portuguese
 Deutsch
 Turkish
 Dutch
Dutch
 Italiano
 Russian
 Romaian
 Portuguese (Brazil)
 Greek
Greek