How Custom Embroidery Digitizing Transforms Raw Vectors into Flawless Stitches
Embroidery is huge right now. People love it for company uniforms, sportswear, and cool fashion items. It makes your brand look super professional and clean. But you cannot just send a basic graphic straight to a machine. Every single logo must go through a hidden setup process first. This step changes everything.
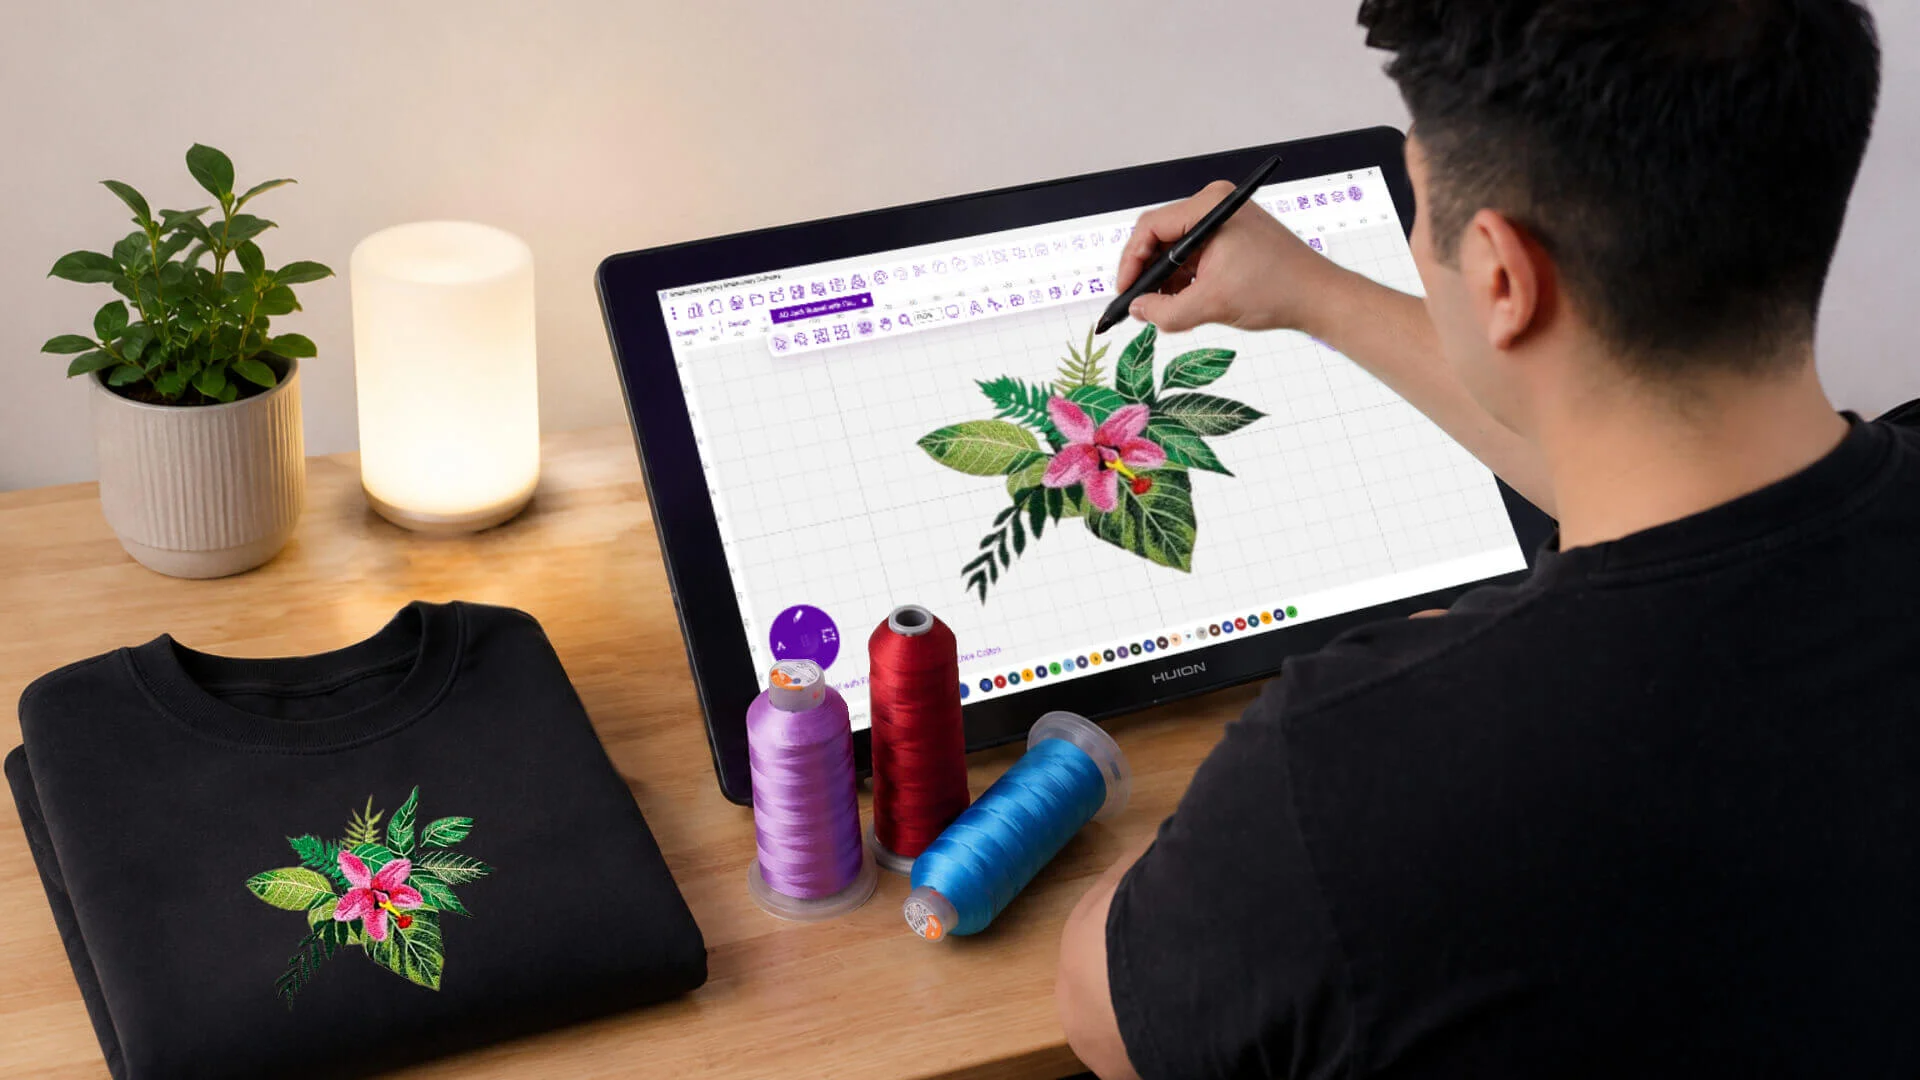
Many shops use top-tier services to convert their files properly. This smart process turns smooth graphic lines into clean stitch paths. We call this essential craft digitizing for machine embroidery. Without this step, even a perfect logo will look like a messy blob on a shirt.
Understanding Vector Artwork
Vector art is usually the starting line for cool apparel projects. Unlike normal photos, vectors do not use tiny pixels. Instead, they use math to map out lines, curves, and shapes. This means you can stretch the image safely. It never gets blurry or pixelated.
Most graphic designers build logos as vectors for easy printing. But your embroidery machine is not a printer. It does not understand shapes or colors. It only reads specific path commands. That is why you need a special file transformation.
What Is Custom Embroidery Digitizing?
Custom digitizing translates your artwork into a map of stitches. A human digitizer sits down and studies the image. Then, they write code that tells the machine needle exactly where to move.
This job is much deeper than a simple file conversion. The designer plans out every single needle drop. They pick the best stitch types and directions. They also calculate thread density and underlay lines. These fast choices decide if your final product looks great or awful.
Why Vector Files Cannot Be Used Directly
Many beginners think they can just plug a vector file right into a machine. Sadly, that never works out.
Vector files hold graphic data, not sewing data. Your machine needs to know where to start and stop. It needs to know how many stitches to use. It must know the perfect speed for each section. Without a digitizer, the machine is totally blind.
The Journey from Artwork to Embroidery
Step 1: Design Analysis
First, the pro artist looks closely at the logo artwork. They check out the shapes, colors, and tiny details. They figure out how the thread will behave on real fabric. Some graphic ideas do not work well in thread. The artist modifies those parts to protect the final look.
Step 2: Selecting Stitch Types
Different parts of a design need different stitch styles. Big open spaces require thick fill stitches. Borders and letters usually look best with satin stitches. Tiny details need running stitches. Picking the right stitch keeps the design smooth and clean.
Step 3: Setting Stitch Direction
Stitch direction changes how light hits the thread. Proper angles add cool depth and texture. They also stop the fabric from twisting up during production. Experienced digitizers tweak these angles to make the logo pop off the shirt.
Step 4: Creating Underlay
Underlay stitches form a hidden floor beneath the design. This floor stabilizes your fabric completely. It supports the heavy top stitches so they do not sink. Good underlay stops shifting and makes the embroidery last for years.
Step 5: Adjusting Density
Density means how close the threads sit next to each other. Too many stitches make the design stiff and bulky. Too few stitches leave ugly gaps showing the fabric. A great digitizer balances this setting perfectly every single time.
How Digitizing Improves Embroidery Quality
Creates Cleaner Details
Professional files bring out the sharpest details in your artwork. A skilled artist simplifies messy lines while saving the main look. This makes your text readable and keeps small lines crisp.
Improves Stitch Flow
Good pathing lets the machine run without stopping. It eliminates useless thread trims and long jumps. This keeps the back of the garment clean. It also speeds up your production floor.
Reduces Production Problems
Bad files cause constant thread breaks and broken needles. They make the fabric pucker up. Well-digitized files keep the machine running smoothly. This saves you from giant headaches.
Enhances Design Durability
Your apparel needs to survive the laundry wheel. Good digitizing locks the threads safely in place. The design will stay bright and intact after many washes.
The Importance of Fabric Consideration
Every Fabric Behaves Differently
Fabrics act wild under a sewing needle. Cotton, polyester, fleece, and hats all need unique software settings. If you use the same file for every material, your work will look sloppy.
Stabilization Matters
Stretchy fabrics love to move around. Digitizers use special pull compensation tricks to stop this movement. This keeps your outlines perfectly straight.
Better Results Through Testing
Pros always run a sample test before starting a big order. This quick step catches tiny errors early. It ensures perfect quality for the real production run.
Common Challenges in Embroidery Digitizing
Small Text
Tiny letters are very hard to sew clearly. Thread is thicker than printer ink. Digitizers slightly enlarge the text and adjust spacing to keep it readable.
Complex Logos
Detailed logos often have pieces that are just too tiny for thread. Experienced artists clean up these busy zones safely. They keep the main brand identity intact.
Fabric Distortion
Thick thread pulls hard on soft cloth. This tension can warp your shapes. Proper digitizing techniques balance this pull to keep circles perfectly round.
Thread Limitations
Thread does not act like flat ink. It has actual physical thickness and height. Digitizers plan around these limits to create clean, beautiful layers.
Why Experience Matters in Custom Digitizing
Digitizing is a technical skill and a beautiful art form. Software cannot do the job alone. You need real human experience to get professional results.
Skilled artists understand machine habits and fabric tricks deeply. Years of practice help them spot errors before sewing starts. This keeps your shop floor running fast and smooth.
Benefits for Businesses
Brands need their logos to look identical on every product. Professional files keep your look consistent across shirts, jackets, and hats. It protects your business identity.
Faster Production
Clean files run fast without any unexpected pauses. This helps your team finish big orders quickly. It boosts your daily shop productivity.
Lower Production Costs
Smart stitch paths save thread and protect your needles. Less downtime means lower operating costs. This keeps more profit in your bank account.
Better Customer Satisfaction
High-quality work builds massive trust with your clients. They will notice the tight stitches and tough designs. Clean results bring repeat business every time.
Choosing the Right Digitizing Partner
Not all digitizing shops give you the same quality. Look for a partner with deep technical knowledge. Check out their actual stitched samples first. Read what other business owners say about them. Working with real pros saves your time and money.
Conclusion
Custom digitizing is the ultimate bridge between art and apparel. It converts raw vectors into perfect stitch files. Careful planning makes your designs clean, tough, and beautiful.
The file quality determines your final look. Investing in expert services saves your budget and protects your brand. It brings your digital art to life flawlessly.